White Automation
I've spent a few days getting very in-depth with White for WPF UI automation so in order to store the information while it's still fresh in my mind I am writing a blog post.
White is a framework for automating interactions with desktop Windows applications. It is built on top of the UIAutomation library which is part of the .NET framework. The project is currently not very active on GitHub but despite this it's still very good at dealing with desktop interactions on Windows.
Automate all the things
For this tutorial I've decided to automate interactions with the Visual Studio 2015 application; since it's software that most people interested in following this tutorial will probably have.
I'm creating my application as a .NET 4.6.1 console application. Generally White is used for automated UI tests, so you might be using a test project. Whichever project type you choose the information in this tutorial will still be relevant.
First we need to add the TestStack.White NuGet package. Right click your project and select Manage NuGet Packages:
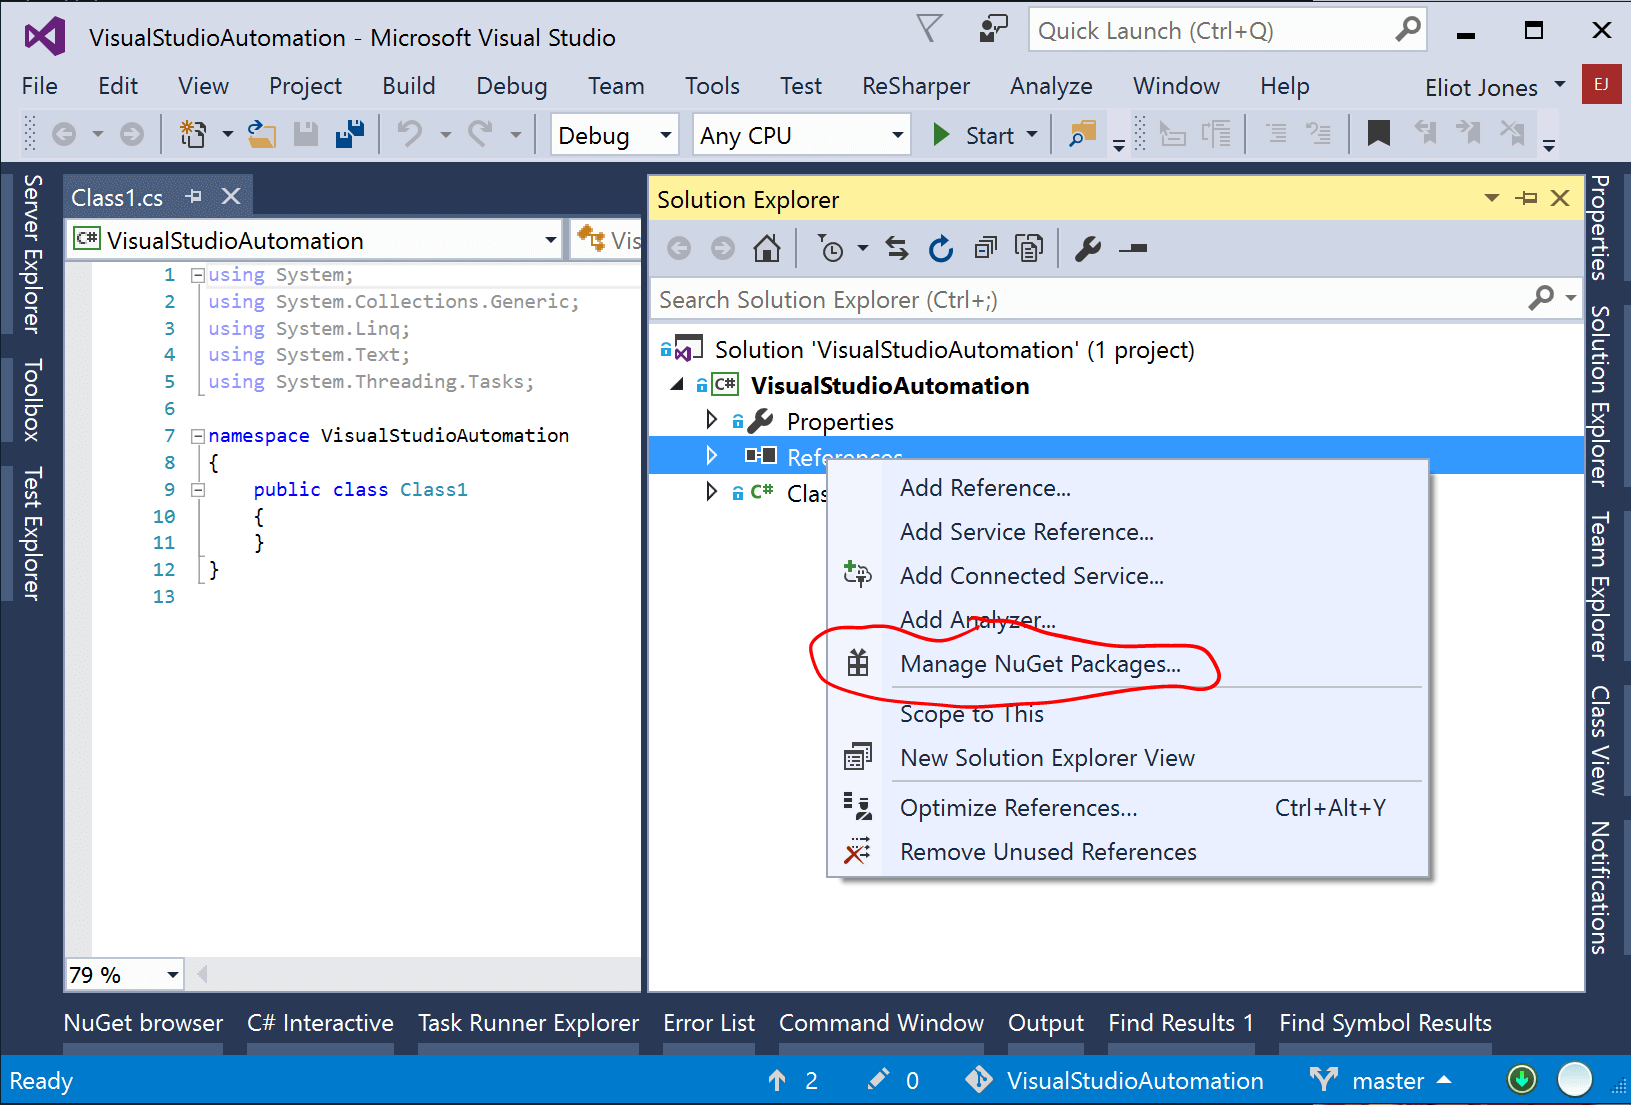
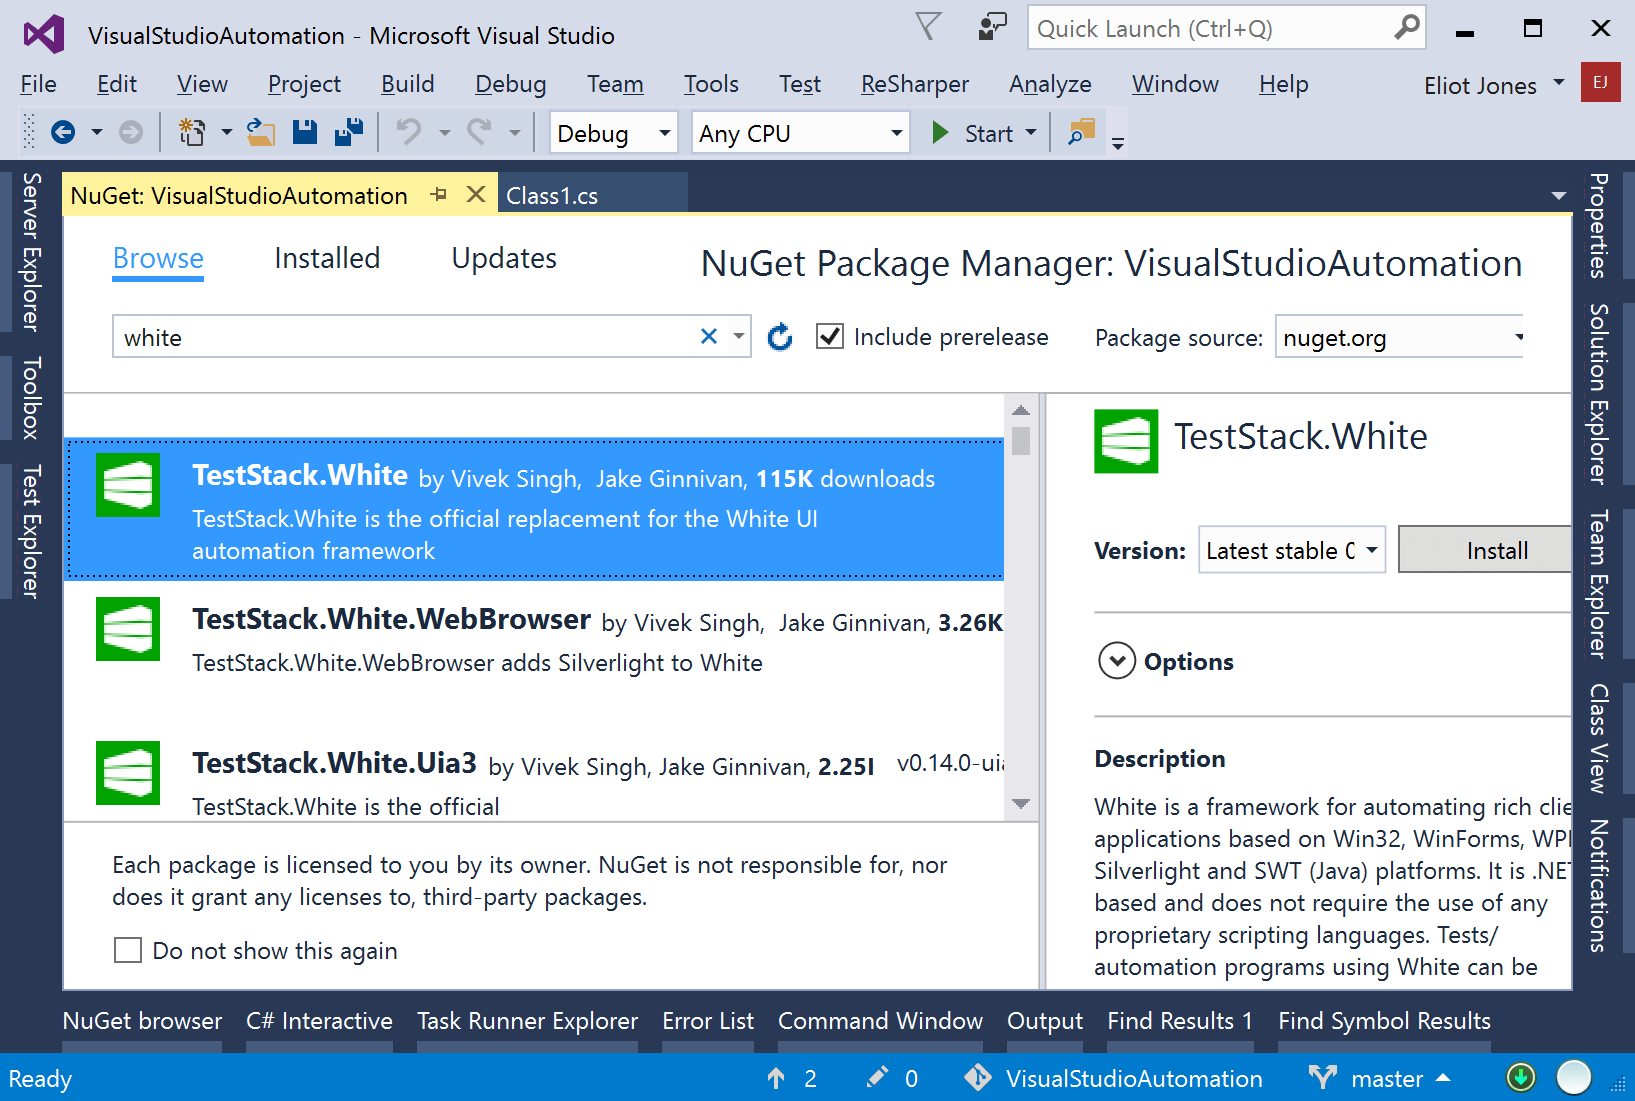
Search the online packages for White and install the TestStack.White package.
Alternatively you can run the installation command from the package manager console.
Install-Package TestStack.White
Once the package is intalled we can start writing code. I have a blank console main method where I'll be putting my code:
public static void Main()
{
    // Writing code here
}
Launch the application
The first thing we need to do is launch the application under test (AUT). The White Application class provides a wrapper over the underlying Windows process.
Add a using statement for the White classes and the process start info:
using System.Diagnostics;
using TestStack.White;
Now we can launch an application, to do this we'll use ProcessStartInfo since it provides us more control over how the application is started, most importantly the Working Directory, otherwise file system access might not work correctly in your application.
The Visual Studio executable is located at the following path for my install:
C:\Program Files (x86)\Microsoft Visual Studio 14.0\Common7\IDE\devenv.exe
To launch it we use the following code:
var processStartInfo = new ProcessStartInfo(@"C:\Program Files (x86)\Microsoft Visual Studio 14.0\Common7\IDE\devenv.exe")
{
    WorkingDirectory = @"C:\Program Files (x86)\Microsoft Visual Studio 14.0\Common7\IDE"
};

var application = Application.Launch(processStartInfo);
This will run the .exe from its normal location. Once the application is running we can get the windows it opens:
var windows = application.GetWindows();
This method blocks until the application opens a window. For Visual Studio this works well since the splash screen is not counted as a window for this purpose; however for other applications the splash screen may display in its own window.
You could wait for a window with some desired property to load using the following code:
var window = windows.FirstOrDefault(x => x.Name.EndsWith("Visual Studio", true, CultureInfo.CurrentCulture));
while (window == null)
{
    Thread.Sleep(1000);

    window = application.GetWindows().FirstOrDefault(x => x.Name.EndsWith("Visual Studio", true, CultureInfo.CurrentCulture));
}
There are probably nicer ways to do this, but in essence we poll every second to check if any of the application windows have the name we want.
If you need to maximise the window once launched you can use PInvoke. To get the main window handle use application.Process.MainWindowHandle.
Once we have the window we want, it's useful to encapsulate it in another class and centralise all logic that is specific to your UI. This is similar to the Page Object Model pattern for Selenium. The benefit is when the UI changes you have 1 place to change your code. Since the default WPF window is usually called MainWindow I create a MainWindow class to mirror this:
using TestStack.White.UIItems.WindowItems;

public class MainWindow
{
    private readonly Window window;

    public MainWindow(Window window)
    {
        this.window = window;
    }
}
Note that we added another using statement for the Window class.
Now we will use our automated Visual Studio 2015 UI to create a new project. To do this we first need to click File > New > Project. This is shown in the screenshot below:

The set menu
To click these menu items we find each of them by their text and click them in turn:
public void ClickNewProject()
{
    IUIItem file = window.Get(SearchCriteria.ByText("File"));
    file.Click();

    IUIItem newItem = window.Get(SearchCriteria.ByText("New"));

    newItem.Click();

    IUIItem projectItem = window.Get(SearchCriteria.ByText("Project..."));
    projectItem.Click();
}
This requires the followingt using statements:
using TestStack.White.UIItems;
using TestStack.White.UIItems.Finders;
using TestStack.White.UIItems.WindowItems;
Once the Project... menu item is clicked a new modal window opens for the user to choose the project type. This is what we need to interact with next.
New project dialog
We will create a new class to contain interaction logic for the "New Project" dialog window. Imaginatively I will call this NewProjectDialog.
This class will take a reference to its White window in the constructor. This window is different to the main window, but both are of the White type Window.
using TestStack.White.UIItems.WindowItems;

public class NewProjectDialog
{
    private readonly Window window;

    public NewProjectDialog(Window window)
    {
        this.window = window;
    }
}
When we call MainWindow.ClickNewProject() it will return us an instance of the NewProjectDialog. To do this we make use of the built in method White has to get modal dialogs (windows which lock focus and do not let you continue using the main window).
The code for ClickNewProject is modified so it returns an object of the type NewProjectDialog:
public NewProjectDialog ClickNewProject()
{
    IUIItem file = window.Get(SearchCriteria.ByText("File"));
    file.Click();

    IUIItem newItem = window.Get(SearchCriteria.ByText("New"));

    newItem.Click();

    IUIItem projectItem = window.Get(SearchCriteria.ByText("Project..."));
    projectItem.Click();

    // Just take the first since it will (should!) be the only one
    var dialog = new NewProjectDialog(window.ModalWindows()[0]);

    return dialog;
}
Finding yourself
This is where the help of a tool to find elements which understands the UIAutomation visual tree becomes invaluable. The latest guidance from Microsoft seems to be to use their Inspect.exe tool which is included in the Windows 10 SDK. Alternatives include:
- UISpy (obsolete)
- Snoop
- Visual Studio Live Visual Tree for debuggable applications
Since I can't be bothered to spend my evenings working out which combination of options needs to be set just-so for the Inspect tool to install, I instead use Snoop to inspect elements.
For this tutorial however I'll be using the debugger to find elements like some sort of caveman.
Peter Piper picked a project
Our NewProjectDialog will initially support 3 methods.
- Select project type. e.g. Class Library, Console Application etc.
- Set project name. Set the full name of the project using the textbox.
- Click ok. Click the ok button to create the project with the selected settings.
I have scaffolded these out and put the first line in the selecting project type method.
using TestStack.White.UIItems.Finders;
using TestStack.White.UIItems.WindowItems;

public class NewProjectDialog
{
    private readonly Window window;

    public NewProjectDialog(Window window)
    {
        this.window = window;
    }

    public void SelectType(string type)
    {
        var allChildren = window.GetMultiple(SearchCriteria.All);
    }

    public void SetName(string projectName)
    {
        throw new System.NotImplementedException();
    }

    public void ClickOk()
    {
        throw new System.NotImplementedException();
    }
}
In order to find what the item we want to click when we change the project type is I've added this line to the SelectType method:
var allChildren = window.GetMultiple(SearchCriteria.All);
This finds all controls that are a child of the dialog, so is quite slow. When we debug it we find the project types are displayed using labels. Therefore we can change the slow line to instead find the label with the text we want.
var item = window.Get<TestStack.White.UIItems.Label>(SearchCriteria.ByText(type));
This returns the label. We can then click it to select the project type.
item.Click();
Our project type is now selected, rejoice!
Change of name
In order to name the project we need to find the text box used to name the project. Once again we get all items in the window so we know how to refine our search:
var allChildren = window.GetMultiple(SearchCriteria.All);
This time in the debugger we find we need to get the text box with the id "txt_Name". We find the item and set the text:
public void SetName(string projectName)
{
    var textBox = window.Get<TestStack.White.UIItems.TextBox>(SearchCriteria.ByAutomationId("txt_Name"));

    textBox.Text = projectName;
}
Finally to click the "OK" button to create the project the ClickOk method looks like this:
public void ClickOk()
{
    var button = window.Get<TestStack.White.UIItems.Button>(SearchCriteria.ByText("OK"));

    button.Click();
}
Under the hood
Initially when I looked at the File menu I couldn't find a way to locate the menu bar itself. This is because the File menu items are MenuProxy objects instead of the normal menu items.
It's useful to know how to narrow down your element search when the items cannot be found by text or automation id. Generally I use a search for all items:
window.GetMultiple(SearchCriteria.All);
Or find all items of a custom type if I know it's a user control or some 3rd party control:
window.GetMultiple(SearchCriteria.ByControlType(ControlType.Custom));
When you run the debugger to evaluate these statements you can inspect the result. This is the best way to make sure you're only looking at what White can see.
While I was looking for the menu items White didn't seem to be able to find them (before I realised it could if I simply searched by text). For this reason I ended up reinventing the SearchCriteria.ByText searching provided by White. To replicate this functionality I wrote a custom searcher which used the underlying UIAutomation framework. I include it here because it's handy to know how to walk the full tree of UIAutomation AutomationElements.
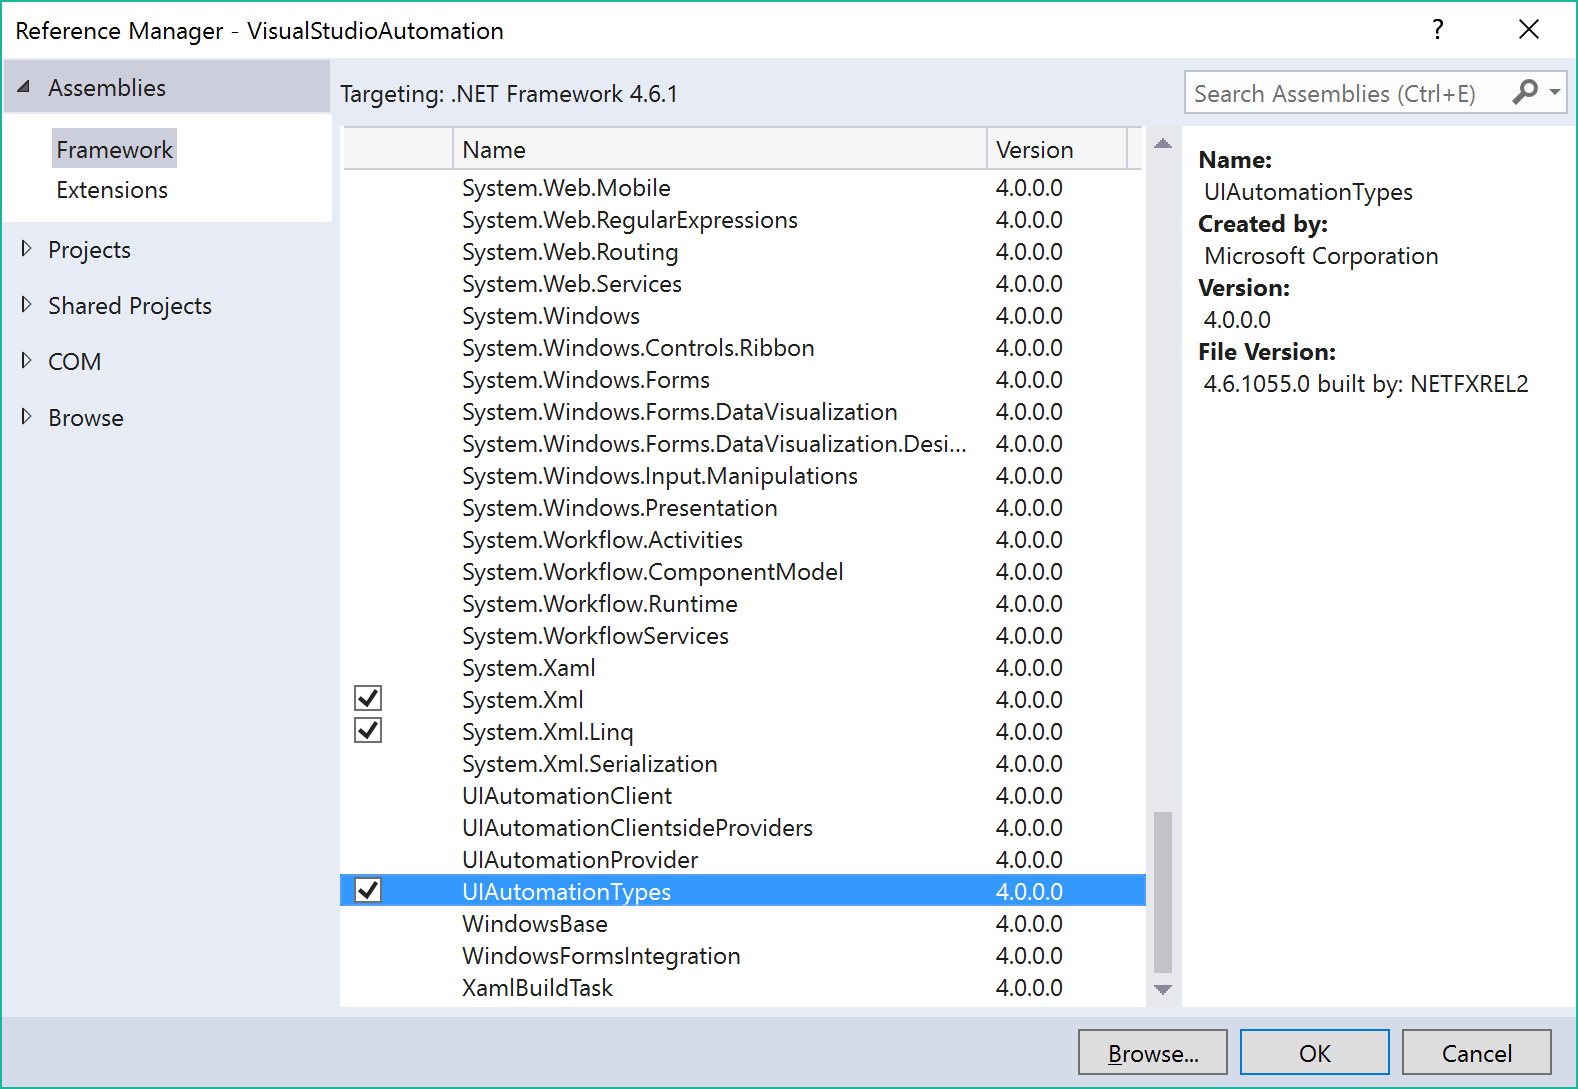
In order to use the UIAutomation framework code I had to add the following references to my project.
- UIAutomationTypes
- UIAutomationClient
- WindowsBase
To add these right click the project and select "Add Reference...".
Each IUIItem in White such as Window, TextBox, Button, etc, exposes an AutomationElement as a property. This is the class used by the UIAutomation framework.
The code below will recursively walk the controls in the window and find any that contain the text passed in. If it doesn't find a match it will return null. I added the method in MainWindow.cs but it could go anywhere:
private static AutomationElement FindAutomationElement(AutomationElement element, string text)
{
    if (element == null)
    {
        return null;
    }

    // Use the tree walker and start at the root element.
    AutomationElement elementNode = TreeWalker.ControlViewWalker.GetFirstChild(element);

    while (elementNode != null)
    {
        // Check the name property to see if it matches the search item.
        if (elementNode.Current.Name.Equals(text, StringComparison.InvariantCultureIgnoreCase))
        {
            return elementNode;
        }

        // Iterate to next element.
        var value = FindAutomationElement(elementNode, text);

        // If we find something we can exit our recursive method early.
        if (value != null)
        {
            return value;
        }

        elementNode = TreeWalker.ControlViewWalker.GetNextSibling(elementNode);
    }

    // No more items in this branch of the tree.
    return null;
}
The using statements required in MainWindow.cs for this code are:
using System;
using System.Windows.Automation;
using TestStack.White.UIItems;
using TestStack.White.UIItems.WindowItems;
Finally I used this method to right click the references node in solution explorer and add a reference to my new project. This method which I put in MainWindow.cs shows how to use White to navigate the UI and filter searches by searching from child objects.
public void AddReference(string referenceName)
{
    var solutionExplorerTab = window.Get(SearchCriteria.ByText("Solution Explorer"));

    // Focus the tab
    solutionExplorerTab.Click();

    // Get the solution explorer tree control
    var solutionExplorerTree = window.Get<Tree>(SearchCriteria.ByAutomationId("SolutionExplorer"));

    // The References node seems to throw an error when clicked normally, so I use my custom method.
    var node = FindAutomationElement(solutionExplorerTree.AutomationElement, "References");

    var nodeItem = new UIItem(node, window);

    // Focus
    nodeItem.Click();

    // Click
    nodeItem.RightClick();

    // The context menu is accessed as a popup on the window.
    window.Popup.Item("Add Reference...").Click();

    // Get the only modal window.
    var dialog = window.ModalWindows()[0];

    // Click the list item for the reference type to activate it and reveal the checkbox.
    var listItem = dialog.Get(SearchCriteria.ByText(referenceName));

    listItem.Click();

    var checkBox = listItem.Get<CheckBox>(SearchCriteria.ByControlType(ControlType.CheckBox));

    checkBox.Checked = true;

    // Click "OK" to close the dialog.
    dialog.Get<Button>(SearchCriteria.ByText("OK")).Click();
}
The full code
You can find the final code for this tutorial on GitHub.