Fun with Nuget
I recently finished the first release of my 2nd Nuget package which provides a class to convert an ADO.Net DataTable to a list of objects. This is the result of an effort to create a library for the conversion technique outlined in this post.
I've also created a Nuget package to help out with MVC 5 Radio Buttons located here.
This post summarises some things I learned from creating these Nuget packages.
Simplest package
For simply packing a class library targeting a single version of the .Net framework you can simply invoke the Nuget.exe with the path to the .csproj:
.\.nuget\NuGet.exe pack .\Path\To\Project.csproj -Prop Configuration=Release
If your solution doesn't have a copy of the Nuget exe in the .nuget solution folder you can download the exe separately.
This command will create the nuget package in the current directory with the metadata declared in the AssemblyInfo.cs for the project.
Creating a specification
The default nuspec specification file created by calling:
Nuget.exe spec
Is fairly self explanatory:
<?xml version="1.0"?>
<package >
  <metadata>
    <id>Package</id>
    <version>1.0.0</version>
    <authors>Eliot</authors>
    <owners>Eliot</owners>
    <licenseUrl>http://LICENSE_URL_HERE_OR_DELETE_THIS_LINE</licenseUrl>
    <projectUrl>http://PROJECT_URL_HERE_OR_DELETE_THIS_LINE</projectUrl>
    <iconUrl>http://ICON_URL_HERE_OR_DELETE_THIS_LINE</iconUrl>
    <requireLicenseAcceptance>false</requireLicenseAcceptance>
    <description>Package description</description>
    <releaseNotes>Summary of changes made in this release of the package.</releaseNotes>
    <copyright>Copyright 2015</copyright>
    <tags>Tag1 Tag2</tags>
    <dependencies>
      <dependency id="SampleDependency" version="1.0" />
    </dependencies>
  </metadata>
</package>
If you have several dlls which target different versions of the .Net framework (for example) you can declare the mapping of files to the package contents like this:
<?xml version="1.0"?>
<package >
  <metadata>
    <id>Package</id>
    <version>1.0.0</version>
    <authors>Eliot</authors>
    <owners>Eliot</owners>
    <licenseUrl>http://LICENSE_URL_HERE_OR_DELETE_THIS_LINE</licenseUrl>
    <projectUrl>http://PROJECT_URL_HERE_OR_DELETE_THIS_LINE</projectUrl>
    <iconUrl>http://ICON_URL_HERE_OR_DELETE_THIS_LINE</iconUrl>
    <requireLicenseAcceptance>false</requireLicenseAcceptance>
    <description>Package description</description>
    <releaseNotes>Summary of changes made in this release of the package.</releaseNotes>
    <copyright>Copyright 2015</copyright>
    <tags>Tag1 Tag2</tags>
    <dependencies>
      <dependency id="SampleDependency" version="1.0" />
    </dependencies>
  </metadata>
    <files>
        <file src="Project\bin\Release\Project.dll" target="lib\net45"/>
        <file src="Project\bin\Release\Project.dll" target="lib\net40"/>
    </files>
</package>
Additionally content you want to install into the user's project on installation of your package can be declared in the files area:
<files>
    <file src="..\MvcProject\Views\Shared\EditorTemplates\*.cshtml" target="Content\Views\Shared\EditorTemplates\"/>
    <file src="..\OtherProject\bin\Release\OtherProject.dll" target="lib\net45"/>
</files>
Targeting multiple versions of the .Net framework
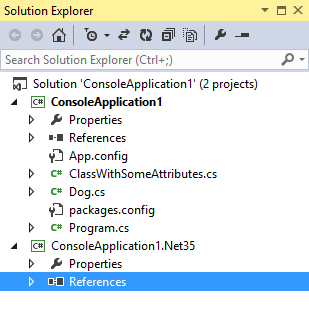
One thing I wanted to do with the DataTable converter project was allow users of .Net 3.5, 4.0 and 4.5 to install and use the converter. Assuming you have a project currently targeting .Net 4.5 that you want to provide compatible versions of for other frameworks you can create a new project with the correct Target Framework, e.g. My.Project and My.Project.Net35.
To avoid having multiple versions of the same code you can then add the code from your main version of the library as linked files.
For example with the following project and new Net 3.5 version:
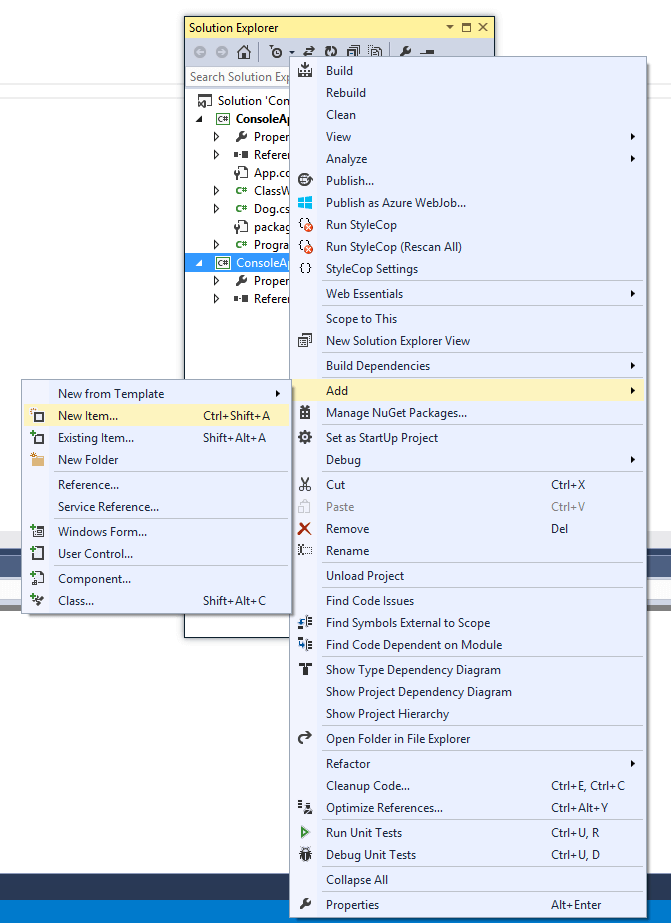
You can add the classes already defined by right clicking the project and choosing Add -> Existing Item:
Select the files from your main project and then before clicking "Add", use the arrow to the right of the button to Add as link:
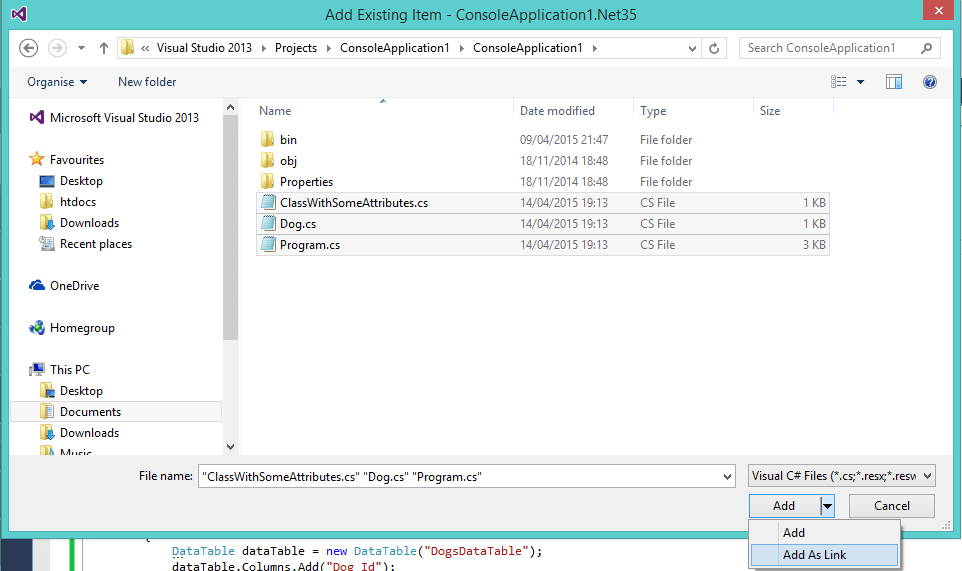
Edits to the linked file will also change the files in the main project so if you need to make changes for compatibility you'll have to create a copy of those files.