Dependency Injection Containers - Cheat Sheet
There are a lot of articles out there that describe both Dependency Injection and Inversion of Control. The purpose of this one is to serve as a quick reference for the things I keep forgetting because configuring a DI container is something I do so infrequently. This is a very simple guide showing the easiest scenarios and the simplest syntax. It walks through the same 3 steps:
1. Create Container
2. Configure Container
3. Retrieve from Container
In the following DI libraries:
- Ninject
- Unity
- SimpleInjector
- StructureMap
Of course it will feature examples tenuously related to animals.
Principals
A Dependency Injection library makes dependency injection easier by doing the work of wiring up an "object graph" (collection of related objects) for your application to use. This is generally done at the entry point to an application:
- For console apps this is in the main method of
Program.cs. - For MVC and Web API apps this is in
Startup.cs. - For class libraries it is difficult to include dependency injection in the library itself as these have no defined entry point. One approach is to rely on the calling application to wire up the dependencies.
- For WebForms apps it is possible to setup the DI container in the
Global.asaxApplication_Start method however it's a bit more complicated.
Console App Example
In this example we're going to begin building a console app which simulates an ecosystem of toads.

The main logic of our simulation will run in the ToadSimulator Class:
public class ToadSimulator
{
    private readonly ILogger logger;
    private readonly SimulationSettingsProvider settingsProvider;
    private ICollection<Toad> simulationToads;

    public ToadSimulator(ILogger logger, SimulationSettingsProvider settingsProvider)
    {
        this.logger = logger;
        this.settingsProvider = settingsProvider;
    }

    public void InitialiseSimulation()
    {
        simulationToads = settingsProvider.RetrieveSimulationToads();

        logger.LogMessage(string.Format("ToadSimulator - Retrieved {0} toads to start the simulation.",
                            simulationToads.Count));
    }
}
This is written to allow constructor injection of both the logger and the class which provides the settings for the simulation.
The settings provider also has a dependency on a logger:
public class SimulationSettingsProvider
{
    private readonly ILogger logger;

    public SimulationSettingsProvider(ILogger logger)
    {
        this.logger = logger;
    }

    internal virtual ICollection<Toad> RetrieveSimulationToads()
    {
        logger.LogMessage("SimulationSettingsProvider - Retrieving Toads.");

        return Database.RetrieveToads();
    }
}
We also provide an implementation of the logger interface:
public interface ILogger
{
    void LogMessage(string message);
}

public class ConsoleLogger : ILogger
{
    private string logBuffer;

    public ConsoleLogger()
    {
        logBuffer = string.Format("Logger (Id = {0}):", this.GetHashCode());
    }

    public void LogMessage(string message)
    {
        logBuffer += Environment.NewLine + message;

        Console.WriteLine(logBuffer);
    }
}
The console logger contains a per instance string so we can see exactly where the logger is getting called from and this will help us to understand the difference between object scopes later. It also records its hashcode (uniquely identifying integer) as an extra tool to understand object scope.
Finally all this gets invoked from the main method of the program:
public static void Main(string[] args)
{
    ToadSimulator toadSimulator = new ToadSimulator(new ConsoleLogger(),
        new SimulationSettingsProvider(new ConsoleLogger()));

    toadSimulator.InitialiseSimulation();
}
Apart from the code in the main method the rest of the classes will not change from now on.
Even with this very simple example we can see that manually creating the dependencies to inject through the code is going to become a lot of work.
This is why we turn to a dependency injection library.
Resolve Using Ninject
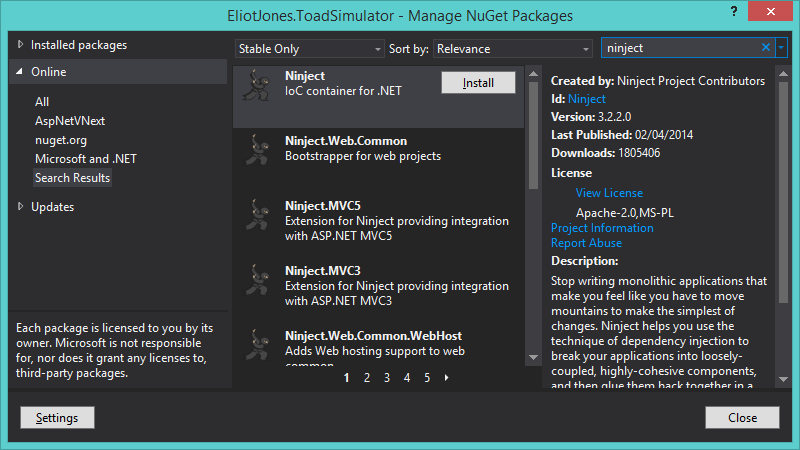
Ninject can be added to a project through NuGet.:
Ninject uses a kernel to store its dependencies, we create one of these in our main method as follows:
IKernel kernel = new StandardKernel();
We now need to bind our logger interface to an implementation. This is done in the configuration of our container. It's useful to have a separate method in another class to configure our container:
internal class Bootstrapper
{
    public static void ConfigureContainer(IKernel kernel)
    {
        kernel.Bind<ILogger>().To<ConsoleLogger>();
    }
}
Once we have resolved the interface we get the kernel to provide us the class we need in our application by using the Get method:
public static void Main(string[] args)
{
    IKernel kernel = new StandardKernel(); // Create Container

    Bootstrapper.ConfigureContainer(kernel); // Configure Container

    ToadSimulator toadSimulator = kernel.Get<ToadSimulator>(); // Retrieve from Container

    toadSimulator.InitialiseSimulation();

    Console.ReadKey();
}
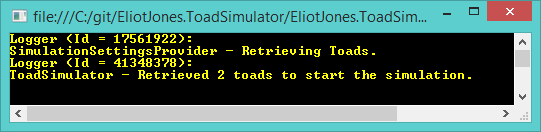
The output of this shows us that like in the original version, without the container, the logger is instantiated twice (the hashcodes differ):
Scope Using Ninject
We can change to scope of our logger as follows:
kernel.Bind<ILogger>().To<ConsoleLogger>().InTransientScope();
This is the default scope of Ninject bindings and is the same as leaving the InTransientScope off. An alternative scope is:
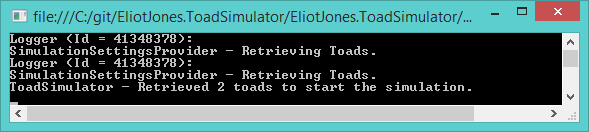
kernel.Bind<ILogger>().To<ConsoleLogger>().InSingletonScope();
With the output showing the logger is a singleton:
Convention Binding Using Ninject
Where we have lots of interfaces or abstract classes to bind, the binding code can quickly become repetitive. Instead we can use convention based configuration. To do this in Ninject we need to add another reference from NuGet. Install the ninject.extensions.conventions package. The kernel can now be bound using lambda expressions.
This example binds interfaces to their only implementing class, obviously this won't work where there are multiple interface implementations:
kernel.Bind(configure => configure.FromThisAssembly()
                .SelectAllClasses().BindDefaultInterfaces());
Using Unity
There are a huge range of DI Libraries, I'm just going to record the example above with a few other libraries, I'm getting these from NuGet. Firstly Microsoft's Unity:
public static void Main(string[] args)
{
    IUnityContainer container = new UnityContainer(); // Create Container

    Bootstrapper.ConfigureContainer(container); // Configure Container

    ToadSimulator toadSimulator = container.Resolve<ToadSimulator>(); // Retrieve from Container

    toadSimulator.InitialiseSimulation();

    Console.ReadKey();
}
And the Bootstrapper code:
public static void ConfigureContainer(IUnityContainer container)
{
    container.RegisterType<ILogger, ConsoleLogger>();
}
With the scope changed:
container.RegisterType<ILogger, ConsoleLogger>(new ContainerControlledLifetimeManager());
The Unity docs located here are great and go through using Unity with Convention based configuration and using Unity with WCF, Webforms and other more advanced use cases.
Using SimpleInjector
Creating a container and retrieving instances:
public static void Main(string[] args)
{
    Container container = new Container(); // Create Container

    Bootstrapper.ConfigureContainer(container); // Configure Container

    ToadSimulator toadSimulator = container.GetInstance<ToadSimulator>(); // Retrieve from Container

    toadSimulator.InitialiseSimulation();

    Console.ReadKey();
}
Bootstrapper code:
public static void ConfigureContainer(Container container)
{
    container.Register<ILogger, ConsoleLogger>();
}
With the scope changed:
container.RegisterSingle<ILogger, ConsoleLogger>();
The SimpleInjector docs located here are very much improved from before and are easy to follow.
Using StructureMap
Creating a container and retrieving instances:
public static void Main(string[] args)
{
    IContainer container = Bootstrapper.ConfigureContainer(); // Configure Container

    ToadSimulator toadSimulator = container.GetInstance<ToadSimulator>(); // Retrieve from Container

    toadSimulator.InitialiseSimulation();

    Console.ReadKey();
}
Bootstrapper code:
public static IContainer ConfigureContainer()
{
    return new Container(x => x.For<ILogger>().Use<ConsoleLogger>()); // Create Container
}
This registers the logger as a singleton instance. For a transient scope the below code worked:
return new Container(x => x.For<ILogger>().Use<ConsoleLogger>().AlwaysUnique());
The StructureMap documentation here is the easiest to follow.
Use with Web API and MVC
Most DI libraries provide a github package specifically tailored to setting up DI in MVC and/or Web Api. For example Unity provides the classes required to call the following method from the WebApiConfig:
public static void Register(HttpConfiguration config)
{
    // Web API configuration and services
    UnityWebApiActivator.Start();
}
Summary
This guide shows how the syntax changes between different DI libraries but the concepts remain the same. It does not provide any detail on advanced usage of DI libraries however should hopefully provide a quick start when changing between DI library syntax.